How To Repair A Dog Bed
Repairing Your Dog’s Bed Made Easy!
Introduction
How to repair a dog bed can help owners make their own simple repairs and save some money and extend the life of the existing dog bed.
Dog beds can suffer wear and tear due to a variety of factors, including chewing, scratching, and the natural aging process. Dog beds are not just a resting place for your beloved canine companion; they are a sanctuary of comfort, warmth, and security.
Over time, however, these cozy havens can experience wear and tear due to your furry friend’s playful antics or simply the natural passage of time. But fear not! Repairing a dog bed is a cost-effective way to extend its lifespan and provide your furry friend with continued comfort.
This article delves into the art of repairing dog beds, offering you some practical tips on how to mend torn fabrics, replace stuffing, and even enhance the bed’s durability.
Assessing the Damage
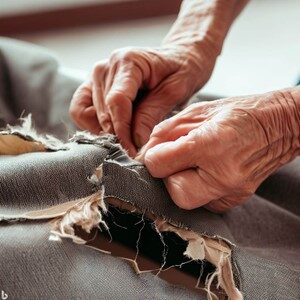
The first step in repairing a dog bed is to thoroughly assess the damage. Take time to identify the areas that need your attention, such as ripped-seams, worn-out fabric, or flattened stuffing. This initial evaluation will help you to determine the extent of the repair needed and gather the necessary materials. This assessment includes the following:
- Minor Fraying: Small, frayed edges or loose threads can be easily repaired using simple trimming using a pair of scissors. Other repairs you may need to use fabric glue or an iron-on patch to fix these minor frayed edges to prevent further fraying.
- Small Tears: Smaller rips in the fabric can be fixed using a needle and thread. Be sure to use the right thread and needle for the repair. Be sure to match the thread to the bed’s color.
- Larger Rips: For those larger tears, these may require patching or other more extensive repair methods. Be sure to select the right patch material that matches the bed’s fabric in terms of texture, color and durability.
Gathering the Materials
After you have assessed the damage, and before embarking on the repair journey, be sure you have the right materials on hand. This might include some of the following:
- Needle and Thread: You need a sturdy needle and some durable thread which is essential for sewing up tears and reinforcing the seams. Try to opt for a thread color that matches the bed’s fabric to maintain a seamless appearance if possible.
- Fabric Patches: If the fabric is torn or damaged beyond a simple repair, fabric patches can be used to reinforce the area and prevent further tearing. Make sure to choose a fabric that is both durable and comfortable for your furry friend.
- Stuffing: Over time, the stuffing that is inside the bed can become flat and lumpy, decreasing its comfort ability. You might want to consider using new stuffing or repurposing old pillows to rejuvenate the bed’s plushness.
- Zipper or Fasteners: If your dog bed has a removable cover, make sure you have a replacement zipper or other fasteners to be ready in case the existing one should get damaged beyond repair.
- Scissors: Have a good pair of fabric scissors on hand as they will come in handy for cutting patches, trimming loose threads, and shaping fabric.
- Adhesive Fabric Tape: This can be useful for those quick fixes or securing minor tears in the fabric temporarily.
Step-by-Step Repair Process
Below is a step-by-step process you can follow to make those necessary dog bed repairs.
- Cleaning: Before starting any repairs, ensure the dog bed is cleaned. Remove the cover, if possible, and wash it according to the manufacturer’s instructions. Clean the stuffing or cushioning it it’s not replaceable.
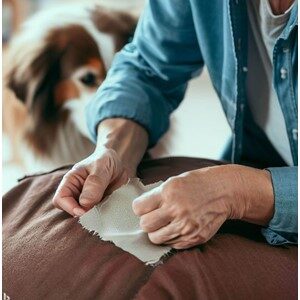
- Mending the Tears: For the small tears or frayed edges, use adhesive fabric tape to temporarily seal the area. For larger tears, place a fabric patch on the damaged area and sew it securely using a needle and thread. Ensure the stitches are tight and even to prevent future unraveling.
- Reinforcing Seams: Now, examine the seams of the bed. If you should notice any weak spots, reinforce them by sewing over the existing stitches or adding new ones. This will prevent further splitting along the seams.
- Replacing the Stuffing: If the stuffing inside the bed has lost its fluffiness, unzip the cover and carefully remove the old stuffing. Replace it with new stuffing material, ensuring it’s distributed evenly for consistent comfort.
- Zipper or Fastener Replacement: It the bed’s cover has a damaged zipper or fastener, carefully remove the old one and sew on the replacement. Ensure the new zipper is installed straight and securely. Note: Some manufacturers do sell replacement covers for their dog beds if yours it badly damaged.
- Final Touches: Once you have completed the repairs, trim any loose threads and give the bed a final inspection to ensure all mended areas are secure. Reassemble the bed and make it ready for your furry friend to use again.
Enhancing the Durability of the Bed
Benjamin Franklin said over 300 years ago “an ounce of prevention is worth a pound of cure” and this is true for your dog’s bed. Prevention is the best form of repair. To enhance the durability of your dog bed and reduce the frequency of repairs, consider some of the following tips:
- Choose High-Quality Materials: When you are purchasing a new dog bed, you must invest in one that is made from durable materials which can withstand your pets activates. This includes his scratching and chewing habits. If you should have an aggressive chewing dog, there are some beds on the market that are warranted against this chewing behavior.
- Regular Cleaning: You must regularly clean the dog bed cover and cushioning according to the manufacturer’s instructions. By doing this, it will prevent dirt and debris from breaking down the fabric over time. It also helps to ensure your pet will always use his bed. Any unwanted bed odors could make your furry friend to skip using his bed. This is what you want to avoid.
- Provide Alternatives: Dog owners know that their furry friend loves to dig and scratch before settling down for the night. Offer designated toys or scratching posts to redirect his behavior away from the dog bed.
- Trim His Nails: Keep your dog’s nails trimmed to prevent them from puncturing or tearing the bed’s fabric. This will require you to establish regular nail trimming sessions with your dog.
- Use a Protective Cover: Consider using a removable, washable cover that acts as a barrier between the bed’s interior and your dog. This can help prolong the bed’s life. Another option is to purchase a second bed cover that can be used when the dirty one is being cleaned or washed.
Conclusion
Repairing a dog bed can be a rewarding endeavor that not only saves you money but also extends the life of a cherished dog bed in your furry friend’s life. By following the steps outlined in this article, you can mend torn fabric, reinforce seams, replace stuffing, and restore the comfort your furry friend deserves.
You may also need to take some time to trim your dog’s nails and keep his bed cover cleaned on a regular basis.
Remember, a well-maintained dog bed contributes to your pet’s overall well-being and happiness, by providing them with a cozy retreat for many years to come.
Go back to the Dog Luxury Beds home page.
Related Articles
Below are some other articles that may be interest to you.


